by Dr. David Bennett | Aug 12, 2026 | Uncategorized |
A clear aligner can look nearly invisible, but it is in contact with your teeth and gums for most of the day. Coffee residue, plaque, saliva, and bacteria can quickly leave trays looking cloudy or smelling unpleasant. Knowing how to care for Invisalign trays helps keep your treatment discreet, comfortable, and moving toward the healthy, confident smile you want.
The routine is simple, but consistency matters. Your aligners should be clean every time you place them back in your mouth, and your teeth should be clean before they go in. A few minutes of care each day can help prevent stains, odors, and avoidable treatment setbacks.
How to Care for Invisalign Trays at Home
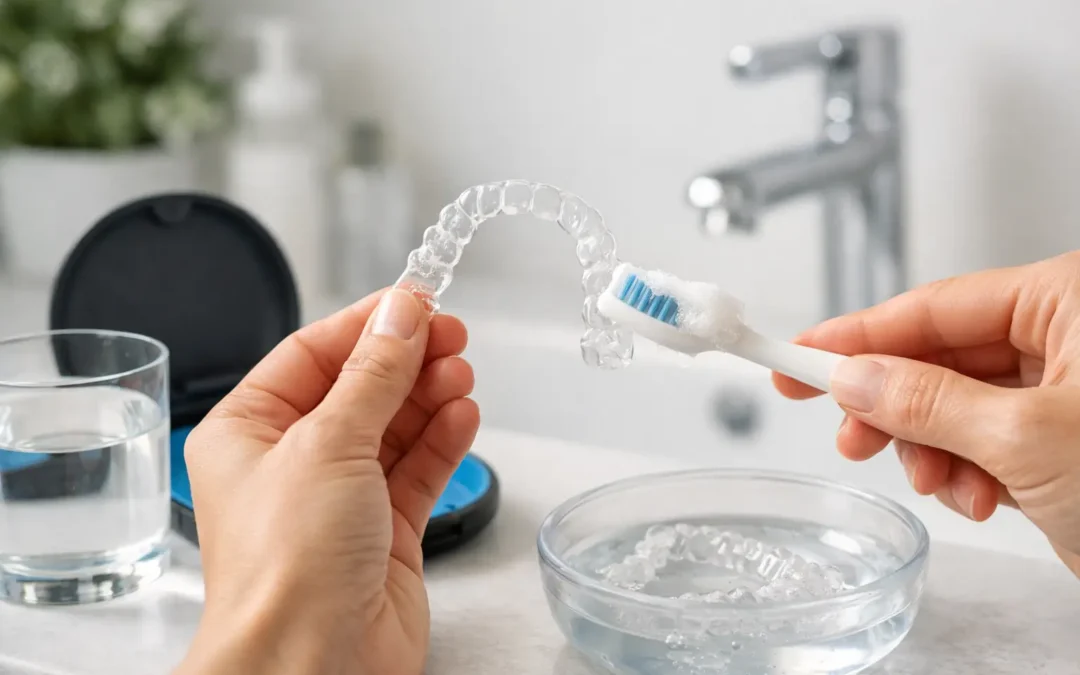
Start by rinsing your trays with cool or lukewarm water whenever you remove them. This helps wash away saliva and loose debris before it can dry onto the plastic. Do not use hot water. Heat can warp the aligner material, changing how the trays fit and potentially affecting the pressure they place on your teeth.
Clean your aligners at least once a day, ideally as part of your morning or evening routine. Use a soft-bristled toothbrush reserved for your trays and a small amount of clear, gentle liquid soap or a cleaner recommended by your dental team. Brush the inside and outside surfaces lightly, then rinse thoroughly before wearing them again.
A soft brush is effective because it reaches the small grooves and edges where buildup tends to collect. The goal is not to scrub aggressively. Invisalign trays are durable enough for daily wear, but harsh brushing can create tiny scratches that make them look dull and give bacteria more places to cling.
For a deeper clean, use aligner-cleaning crystals, tablets, or another product your dentist approves. Soak the trays as directed, then brush and rinse them before putting them back in. This can be especially helpful if you notice a film, odor, or discoloration that routine cleaning does not remove.
Keep Toothpaste and Heat Away From Aligners
Toothpaste may seem like the obvious choice, but most toothpastes are too abrasive for clear aligners. Over time, they can scratch the plastic and make your trays more noticeable. Colored toothpaste can also leave residue in the aligners, particularly around the edges.
Avoid mouthwash unless your dentist specifically tells you it is appropriate for your trays. Many mouthwashes contain dyes or alcohol that can discolor or dry the material. Likewise, do not clean aligners with bleach, denture cleaner, scented soap, or household cleaning products. These products can be too harsh and may leave behind substances you do not want against your teeth and gums.
Hot water deserves another reminder. It can be tempting to use warm water to loosen buildup, but a warped tray may no longer fit as designed. If an aligner feels suddenly loose, distorted, or uncomfortable after cleaning, contact your dental office before moving ahead to the next set.
Remove Trays for Every Meal and Drink
Invisalign treatment typically requires wearing aligners for 20 to 22 hours each day, so it is understandable to want to leave them in whenever possible. However, trays should come out before meals and snacks. Food can get trapped between the aligner and your teeth, increasing the chance of staining, plaque buildup, and cavities.
Water is generally the only drink that is safe to have while wearing your trays. Coffee, tea, red wine, soda, sports drinks, and colored juices can stain aligners and teeth. Sugary or acidic drinks are an even bigger concern because they can sit against tooth surfaces under the tray, increasing the risk of enamel damage.
If you have coffee or another beverage with your aligners out, brush your teeth before replacing them whenever possible. If brushing is not practical, rinse your mouth well with water and clean your teeth as soon as you can. Putting trays back over food particles or sugary residue can lead to bad breath and tooth decay during treatment.
Store Your Invisalign Trays Safely
The most common way patients lose aligners is surprisingly simple: they wrap them in a napkin during a meal and accidentally throw them away. Always place trays in their protective case when they are not in your mouth. Keep the case with you at work, school, restaurants, and while traveling.
Leaving aligners loose on a table, in a pocket, or in a car exposes them to damage, dirt, and heat. Pets are also known for chewing aligners, so keep the case closed and out of reach. A replacement tray may be needed if your aligner is lost or broken, and that can affect your schedule depending on where you are in treatment.
It is also wise to keep your previous set of trays in the labeled bag provided by your dental office. If your current aligner breaks or goes missing, your dentist may advise you to wear the prior set temporarily. Do not make that decision on your own, though. Your treatment plan is personalized, and the right next step depends on how long you have worn the current trays.
Build a Routine That Protects Your Teeth, Too
Clear aligners work best when oral hygiene is strong. Brush at least twice daily, floss every day, and pay special attention after meals before replacing your trays. Because aligners cover the teeth closely, they can hold bacteria against enamel if food debris is left behind.
Consider carrying a small care kit with a travel toothbrush, toothpaste, floss, aligner case, and cleaning product approved by your dentist. For busy professionals and parents on the go, this makes it much easier to stay consistent between meetings, errands, and family activities.
You should also follow the wear time and change schedule given by your Invisalign provider. Wearing trays inconsistently, switching sets early, or skipping ahead can interfere with tooth movement. If an aligner is unusually painful, will not seat fully, cracks, or repeatedly pops off, call your dental team. Do not try to reshape it yourself.
What to Do If Trays Become Cloudy or Smell Bad
Cloudiness and odor usually point to buildup, not a permanent problem. First, give the aligners a proper soak with a dentist-approved cleaner, gently brush them with clear liquid soap, and rinse them thoroughly. Then review your habits. Are you drinking anything besides water with trays in? Are you brushing before reinserting them? Are the trays spending too much time outside their case?
If the problem persists, bring the aligners to your appointment. Your dentist can check the fit, look for damage, and recommend a safe cleaning approach. Never attempt to mask odor with perfume, mouthwash, or scented products. Clean trays should have little to no smell.
When to Contact Your Invisalign Provider
Reach out promptly if you lose an aligner, it becomes cracked, it no longer fits, or you develop persistent gum irritation. Early guidance can prevent a small issue from turning into a delay. If you experience tooth pain that feels severe or unusual, swelling, or signs of a dental emergency, contact your dental office right away.
At United Dental Specialists, Invisalign care is designed around your smile goals, daily routine, and oral health. Keeping your trays clean and wearing them as directed protects the investment you are making in a straighter, healthier-looking smile. If you have questions about your aligners or need help with a damaged or missing tray, schedule an appointment so your treatment can stay on track.
by Dr. David Bennett | Aug 10, 2026 | Uncategorized |
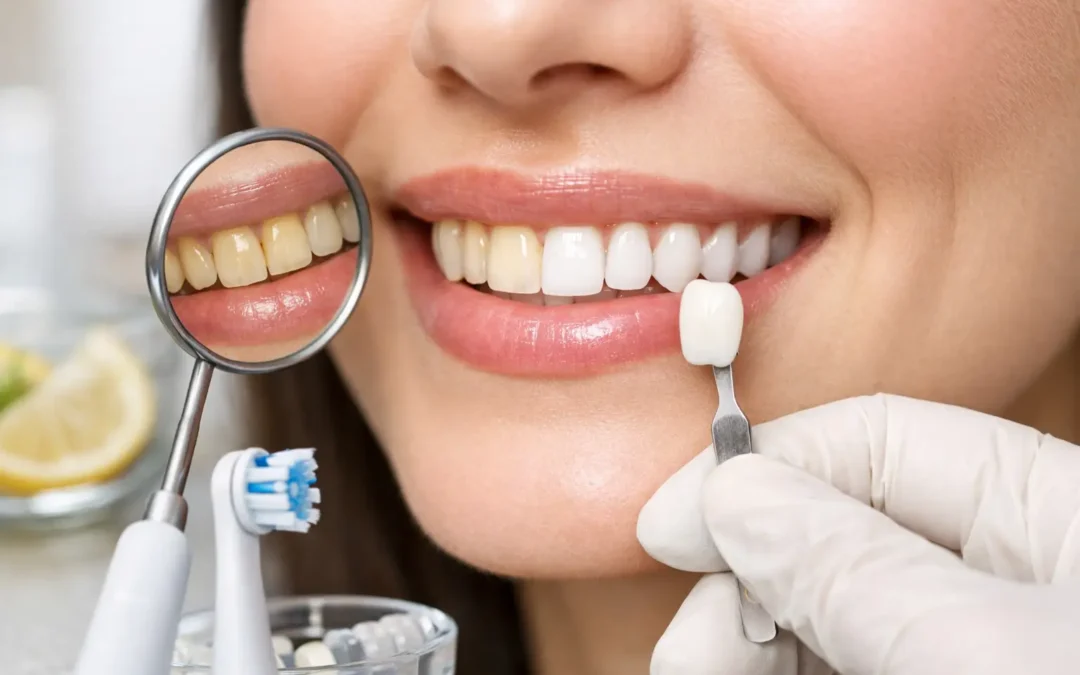
Coffee on the commute, red wine at dinner, and years of everyday eating can slowly change the color of your teeth. If you are wondering how to fix stained teeth, the best answer depends on what caused the discoloration, how deep it is, and the condition of your enamel. The right treatment can make a meaningful difference, but not every stain should be treated the same way.
A brighter smile should still be a healthy smile. Before reaching for a whitening strip or a viral home remedy, it helps to understand which options work, which can cause sensitivity or enamel damage, and when professional care offers the most predictable result.
Why Teeth Become Stained
Some stains sit on the outer surface of the tooth. Others develop within the tooth structure itself. This distinction matters because surface stains often respond well to cleaning and whitening, while deeper discoloration may need a cosmetic solution such as bonding or veneers.
Surface stains, also called extrinsic stains, are commonly caused by coffee, tea, red wine, dark sodas, berries, tomato-based sauces, and tobacco use. These pigments can collect in the natural microscopic texture of enamel, especially when plaque and tartar are present. Even a healthy diet can include foods and drinks that gradually affect tooth color.
Intrinsic stains come from inside the tooth. They may be related to aging, certain medications, trauma to a tooth, developmental changes, or a root canal. As enamel naturally becomes thinner over time, the warmer-colored dentin beneath it becomes more visible. A single tooth that suddenly turns gray, brown, or darker than the surrounding teeth should be examined promptly, particularly if there is a history of injury or pain.
How to Fix Stained Teeth Based on the Cause
The most effective treatment begins with an exam and professional cleaning. Many patients are surprised by how much brighter their smile looks after plaque, tartar, and surface buildup are removed. A cleaning does not change the natural shade of teeth, but it can remove stains that whitening products cannot reach through hardened deposits.
Start With a Professional Cleaning
Tartar cannot be brushed away at home. If it is contributing to dullness or staining near the gumline, a dental hygienist can remove it safely without damaging enamel. This also gives your dental team a clear view of cavities, gum inflammation, worn enamel, and existing dental work that may affect your whitening plan.
A cleaning is especially valuable if your teeth look yellow because of buildup, you have not had a recent checkup, or your gums bleed when you brush or floss. Whitening over active gum disease, untreated decay, or exposed roots can lead to unnecessary discomfort.
Consider Professional Teeth Whitening
For many adults with generalized yellowing or food-and-drink stains, professional whitening is the fastest and most reliable option. Professional systems use carefully selected whitening ingredients and application methods to lift stains while helping minimize irritation to the gums.
The result is usually more noticeable and more even than over-the-counter products. Your dentist can also advise whether in-office whitening, custom take-home trays, or a combination approach makes sense for your goals, timeline, and sensitivity level. Someone preparing for a wedding, job interview, or major event may prefer an in-office option, while custom trays can offer gradual whitening on a more flexible schedule.
Whitening is not permanent because teeth can pick up new stains over time. Many patients maintain their results with good oral hygiene, thoughtful food and drink habits, and occasional touch-up treatment recommended by their dentist.
Know When Whitening Will Not Solve the Problem
Whitening products only change natural tooth enamel. They do not whiten crowns, veneers, bonding, fillings, or dental implants. If a front crown has become darker or no longer matches the shade of your surrounding teeth, replacement may be the better cosmetic option.
Deep gray, brown, or uneven stains may also respond poorly to bleaching. In these cases, cosmetic bonding or porcelain veneers can cover discoloration while improving shape, symmetry, and minor wear. Veneers are a more significant investment than whitening, and they require careful planning, but they can be an excellent option for patients who want a longer-lasting improvement in both color and smile design.
For a tooth that has darkened after a root canal, your dentist may recommend internal whitening or a restorative solution based on the tooth’s strength and appearance. This is not a situation for a store-bought whitening kit.
At-Home Habits That Help Prevent New Stains
At-home care will not produce the same change as professional whitening, but it plays a major role in preventing stains from returning. Brush twice daily with a soft-bristled toothbrush and fluoride toothpaste, and clean between your teeth every day with floss or another interdental cleaner. Removing plaque regularly gives pigments fewer places to cling.
After coffee, tea, wine, or dark-colored foods, rinse with water when you can. This simple habit reduces the time staining compounds remain on your enamel. Drinking iced coffee or dark beverages through a straw may also reduce contact with the front teeth, although it is not a substitute for brushing and regular dental visits.
Wait about 30 minutes to brush after acidic drinks such as soda, citrus beverages, or sports drinks. Acid temporarily softens enamel, and brushing immediately can contribute to wear. Water, sugar-free gum, and time allow saliva to help restore a healthier mouth environment first.
If you use tobacco, quitting can improve both the appearance of your teeth and the health of your gums. Tobacco stains are often stubborn, and continued use can quickly darken teeth after whitening.
Be Careful With DIY Whitening Trends
Not every product marketed as natural or fast-working is safe for your smile. Activated charcoal, abrasive baking soda routines, lemon juice, vinegar, and other acidic home remedies can wear down enamel. Once enamel is thinned, teeth may appear more yellow because more dentin shows through. Enamel does not grow back.
Over-the-counter whitening strips and toothpastes can help with mild staining for some people, but they have limits. Whitening toothpastes primarily remove surface stains through polishing ingredients. Used too aggressively, highly abrasive products may increase sensitivity or contribute to enamel wear.
Whitening strips can lighten teeth, but generic trays and strips do not account for gum recession, existing restorations, cavities, or uneven tooth color. If whitening causes sharp pain, persistent sensitivity, or gum irritation, stop using the product and schedule a dental evaluation.
How to Keep Your Smile Bright After Treatment
A bright smile does not require giving up every food or drink you enjoy. It calls for a realistic maintenance routine. Continue professional cleanings on the schedule recommended for your oral health, brush and floss consistently, and address small concerns before they become more complicated.
If you have crowns, veneers, or bonding, use non-abrasive products and ask your dental team which toothpaste is appropriate. The goal is to protect the polish and avoid creating a mismatch between natural teeth and restorations. Patients with frequent sensitivity may also benefit from a desensitizing toothpaste before and after whitening treatment.
Regular exams matter because color changes can occasionally signal more than a cosmetic concern. A dark tooth, a new spot that does not brush away, or discoloration combined with pain, swelling, or sensitivity deserves prompt attention.
Get a Personalized Plan for a Brighter Smile
There is no one-size-fits-all answer to stained teeth. The safest path is to identify whether the discoloration is from surface buildup, natural aging, an old restoration, or a deeper issue within a tooth. From there, treatment can be tailored to protect your oral health while improving the appearance of your smile.
At United Dental Specialists, a personalized cosmetic consultation can help you compare professional whitening, bonding, veneers, and restorative options with confidence. A healthy, brighter smile starts with a plan that fits your teeth, your goals, and your comfort level.
by Dr. David Bennett | Aug 8, 2026 | Uncategorized |
A front tooth with a large crack needs a different solution than a healthy tooth with a stain that whitening cannot remove. That is why the dental crowns vs veneers decision should never be based on appearance alone. Both treatments can create a more confident smile, but they solve different problems and require different levels of tooth preparation.
At United Dental Specialists, treatment planning starts with what your tooth needs to stay healthy and functional, then considers the cosmetic result you want. The right choice may be a crown, a veneer, or sometimes a more conservative treatment altogether.
Dental Crowns vs Veneers: The Main Difference
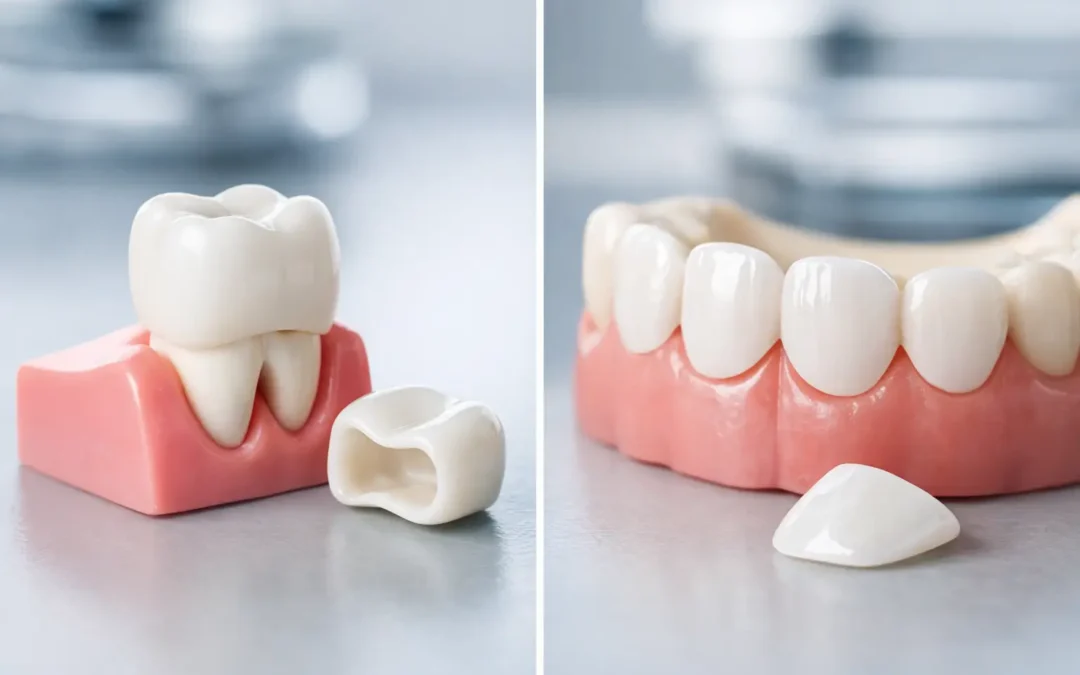
A dental crown covers the entire visible portion of a tooth, much like a fitted cap. It is designed to restore a tooth that has been weakened by a large cavity, fracture, root canal treatment, extensive old filling, or significant wear. A crown can improve the look of a tooth, but its primary job is to protect what remains of the natural tooth and restore biting strength.
A veneer is a thin custom shell, typically made from porcelain, bonded to the front surface of a tooth. Veneers are usually chosen when the tooth is structurally healthy but its appearance is a concern. They can address discoloration, small chips, uneven edges, minor spacing, worn enamel, or teeth that look slightly too short or misshapen.
Think of it this way: a crown is often the better answer when a tooth needs reinforcement from all sides. A veneer is often the better answer when the tooth is healthy enough but needs a visible cosmetic improvement.
When a Crown Is the Better Choice
Crowns are restorative treatments first. If biting pressure could cause a weakened tooth to crack further, a veneer would not provide enough support. A crown surrounds the tooth and distributes biting forces more evenly, helping protect it during everyday chewing.
Your dentist may recommend a crown if you have a tooth with a large filling that has left little natural structure, a deep fracture, severe decay, or a tooth that has been treated with a root canal. Crowns are also commonly used to complete a dental implant restoration. In that case, the crown replaces the visible part of a missing tooth and is attached to the implant beneath the gumline.
For patients who grind or clench their teeth, crowns may also be a more dependable choice for teeth with significant damage. Grinding can place heavy pressure on any restoration. A custom night guard may still be recommended to protect the crown, your surrounding teeth, and your jaw joints.
Modern crowns can look remarkably natural. Porcelain and ceramic options are selected to match the shade, shape, and translucency of nearby teeth, especially when restoring a tooth near the front of the smile. Still, crown treatment generally requires more reshaping of the natural tooth than veneer treatment because the restoration must fit around the full tooth.
When Veneers Are the Better Choice
Veneers are designed for healthy teeth that need a cosmetic refresh. They are especially useful when whitening alone will not give you the result you want. Certain stains caused by medications, trauma, aging, or natural tooth color can remain visible even after professional whitening. Porcelain veneers can create a brighter, more uniform appearance while resisting stains better than natural enamel.
They can also improve symmetry across the smile. A veneer may make a narrow tooth appear wider, balance a slightly uneven gumline visually, close small spaces, or smooth the appearance of chipped edges. For a smile makeover, veneers are often planned across several visible teeth so the final result looks balanced rather than overly uniform.
Because veneers cover the front and edge of a tooth rather than the whole tooth, they generally preserve more natural tooth structure than crowns. However, many veneers still require the removal of a small amount of enamel to create room for a natural-looking result. This means veneers are not simply a temporary cosmetic cover that can be removed later without consequences. Once enamel is altered, the tooth will usually need a veneer or another restoration moving forward.
Veneers are not ideal for every cosmetic concern. If a tooth has active decay, a large fracture, poor enamel quality, or a large existing filling, it may need a crown or another restorative treatment first. Healthy gums are also essential. Cosmetic dentistry looks its best when the foundation of the smile is healthy.
Appearance, Durability, and Daily Function
Both crowns and porcelain veneers can be color-matched and custom shaped for a natural result. The difference is how they perform and what they are designed to withstand. A well-made crown is typically built to handle stronger chewing forces, particularly on back teeth. Veneers are durable but thinner, making them better suited to cosmetic changes on front teeth when the underlying tooth is stable.
Neither treatment is indestructible. Crowns and veneers can chip, loosen, or fracture, particularly when patients bite ice, chew pens, open packages with their teeth, or grind their teeth at night. Good home care and regular dental visits protect the investment in either option.
Brushing twice daily with a nonabrasive toothpaste, flossing around each tooth, and seeing your dentist for routine exams and cleanings remain essential. While porcelain itself cannot decay, the natural tooth edge and gumline around a restoration can still develop cavities or inflammation. Careful hygiene helps prevent problems that may shorten the life of a crown or veneer.
What Does the Treatment Process Look Like?
The process starts with a consultation and examination. Your dentist will review your goals, check the health of your teeth and gums, evaluate your bite, and take any necessary X-rays or digital images. This step matters because a cosmetic concern can sometimes reveal a functional issue, such as tooth grinding, decay, or an uneven bite.
For a crown, the tooth is carefully reshaped to make room for the restoration. If decay or damaged material is present, it is removed first. An impression or digital scan is taken, and a temporary crown may be placed while a dental lab creates the final restoration. At the final visit, the crown is checked for fit, color, comfort, and bite before being bonded or cemented into place.
For veneers, the dentist plans the size, shape, and shade based on your facial features, bite, and smile goals. A small amount of enamel may be refined, then a scan or impression is used to create your custom veneers. Temporary veneers may be used in some cases. Once the final veneers are ready, your dentist confirms the fit and appearance before bonding them to the teeth.
The exact timeline varies depending on the number of teeth being treated, your oral health needs, and the type of restoration selected. If you need gum care, fillings, or bite treatment first, addressing those concerns creates a stronger foundation for long-lasting cosmetic results.
Cost Considerations Without the Guesswork
Cost is a practical part of the conversation, and it depends on the tooth being treated, materials used, the complexity of your case, and whether additional dental care is needed. A crown may be partially covered by dental insurance when it is medically necessary to restore a damaged tooth. Veneers are commonly considered elective cosmetic treatment, so insurance coverage is less common.
The lowest upfront price is not always the best value. A veneer placed on a tooth that really needs structural support can lead to further damage and additional treatment. On the other hand, placing a crown on a healthy tooth solely to change its appearance may remove more natural structure than necessary. A personalized recommendation helps you invest in the treatment that fits both your oral health and your goals.
How to Choose Between a Crown and a Veneer
The best choice comes down to one central question: is the tooth mainly unhealthy or weakened, or is it healthy but cosmetically disappointing? A crown is usually recommended when strength, protection, and restoration are the priorities. A veneer is often recommended when you want to improve the visible front surface of a stable, healthy tooth.
Your bite also matters. If you clench, grind, or have teeth that meet unevenly, your dentist may recommend protective measures or a different treatment plan. The most beautiful result should also feel comfortable when you speak, eat, and smile.
If you are considering crowns or veneers, schedule a cosmetic consultation and bring your questions, photos, and goals. A clear exam and personalized plan can help you move forward with a smile that looks natural, feels comfortable, and is built to support your long-term oral health.
by Dr. David Bennett | Aug 6, 2026 | Uncategorized |
A dental implant may feel and function like a natural tooth, but it needs a different kind of attention at the gumline. Knowing how to clean dental implants correctly helps protect the healthy tissue and bone that keep your restoration stable, comfortable, and beautiful for years to come.
Implants cannot develop cavities, but the gums and bone around them can still become inflamed or infected. Plaque can collect where the crown meets the gumline, beneath a bridge, and in the spaces that ordinary brushing may miss. The good news is that a consistent home routine, paired with professional cleanings, can make implant care straightforward.
Why Cleaning Dental Implants Matters
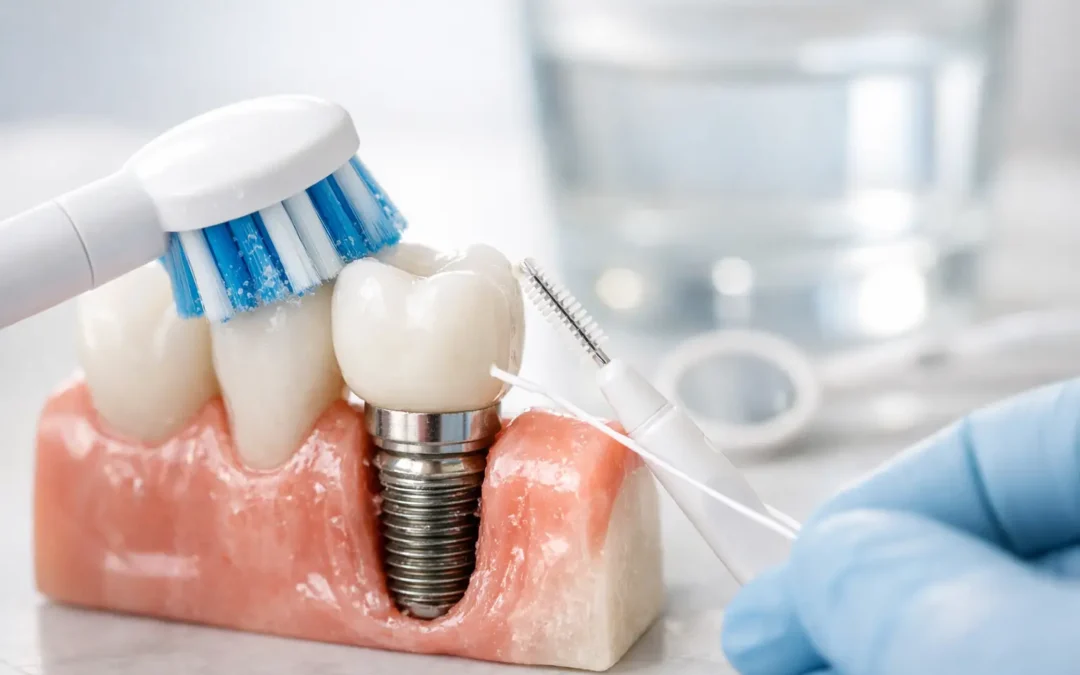
Your implant restoration has several parts: the implant post in the jawbone, the connector piece, and the visible crown, bridge, or full-arch restoration. While the implant itself is made from biocompatible materials, the surrounding gums are still vulnerable to bacteria.
When plaque is not removed thoroughly, it can lead to redness, bleeding, tenderness, and bad breath. Early inflammation around an implant is often called peri-implant mucositis. Without treatment, it can progress to peri-implantitis, a more serious condition that may involve bone loss around the implant.
That does not mean implants are difficult to maintain. It means they deserve the same commitment you would give to natural teeth, with a little extra attention to the areas around the restoration. Good cleaning protects not only your oral health, but also the time and investment you have made in your new smile.
How to Clean Dental Implants Every Day
The most effective routine is one you can follow consistently. Brush twice daily, clean between the teeth or beneath the restoration once daily, and pay close attention to the gumline.
Brush Gently for Two Full Minutes
Use a soft-bristled manual toothbrush or a soft electric toothbrush head. Hold the bristles at a gentle angle toward the gumline and use small, controlled motions around every side of the implant crown. Do not scrub aggressively. Heavy pressure can irritate your gums and may not remove plaque any better.
A non-abrasive toothpaste is usually the right choice. Very gritty whitening formulas, charcoal powders, or abrasive pastes can gradually dull or scratch certain restoration materials. Fluoride toothpaste is generally safe and helpful for protecting your remaining natural teeth, unless your dentist has recommended a specific product for your needs.
Do not rush the back and tongue-side surfaces. Those areas are easy to miss, especially around implant-supported bridges. If you have an electric toothbrush with a pressure sensor or timer, it can be a useful tool for making your routine more consistent.
Clean Between Teeth and Under Bridges
Brushing alone does not reach the tight spaces between teeth or beneath an implant bridge. The best method depends on the type of restoration you have and the shape of the spaces around it.
For a single implant crown, floss may be appropriate if it moves comfortably between the implant and neighboring teeth. Use a gentle sawing motion rather than snapping floss down through the contact point. Implant-specific floss, soft woven floss, or a floss threader may be easier to use around wider spaces.
For implant-supported bridges, you may need to clean underneath the artificial teeth. A floss threader can guide soft floss below the bridge so you can sweep it back and forth along the gumline. Many patients also benefit from an interdental brush designed for implant care. Choose a soft brush with a plastic-coated or nylon-coated wire, and use a size recommended by your dental team. A brush that is too large can traumatize the tissue, while one that is too small may not clean effectively.
A water flosser can be an excellent addition, particularly for full-arch restorations and bridges. It helps flush food particles from hard-to-reach areas and can make daily care feel more comfortable. Still, it works best as a complement to brushing and other between-teeth cleaning, not as a substitute for every other step.
Rinse When It Supports Your Routine
An alcohol-free antimicrobial mouth rinse may be recommended if you have gum inflammation, dry mouth, or a history of periodontal disease. However, mouthwash is not a replacement for mechanical plaque removal with a toothbrush, floss, or interdental cleaner.
If you are unsure which rinse is right for you, ask your dentist or hygienist. Some patients need a short-term prescription rinse after treatment, while others only need a gentle over-the-counter option as part of everyday maintenance.
Choose Tools That Protect Your Restoration
The right products should clean effectively without scratching the implant crown, damaging gum tissue, or making your mouth uncomfortable. Your dental team may personalize recommendations, especially if you have several implants, sensitive gums, or a full-arch restoration.
In general, use soft bristles, low-abrasion toothpaste, gentle floss, and implant-safe interdental brushes. Avoid using sharp metal instruments, toothpicks that splinter, or hard bristles to dig around the crown. You should also be cautious with highly abrasive stain-removal products. A clean implant should look polished and natural, not scratched from overly aggressive home care.
Smoking and frequent tobacco use can also make maintaining implant health more challenging by affecting gum healing and increasing the risk of complications. If you smoke, your dentist can discuss practical steps to protect your implants and support your overall oral health.
Caring for All-on-4 and Full-Arch Implants
Full-arch implant restorations can restore confidence, chewing comfort, and the appearance of a complete smile. They also create areas underneath the bridge where food debris and plaque can collect. Daily cleaning is essential.
Use a soft toothbrush to clean the visible teeth, gums, and the transition area where the bridge meets your gums. A water flosser is particularly helpful for gently flushing beneath the prosthesis. Many patients also use a floss threader, implant floss, or a specially shaped interdental brush to clean under the bridge more thoroughly.
The exact method depends on whether your restoration is fixed or removable. Never try to remove a fixed full-arch bridge yourself. If you have a removable overdenture, follow the instructions provided by your dentist for taking it out, brushing it, and cleaning around the attachments. When in doubt, bring your cleaning tools to your next appointment and ask for a hands-on demonstration.
Professional Implant Cleanings Are Not Optional
Even an excellent home routine cannot remove hardened tartar or fully evaluate the health of the tissues around an implant. Regular professional visits allow your dental team to check your bite, inspect the crown or bridge, monitor your gum health, and use instruments appropriate for implant restorations.
Your recommended schedule may be every three, four, or six months. It depends on your history of gum disease, how many implants you have, your home-care routine, and whether you have a bridge or full-arch restoration. Patients with a history of periodontal disease often benefit from more frequent maintenance visits.
At these appointments, let your hygienist know if food has been getting trapped, floss has started catching, or your bite feels different. Small changes can be easier to address before they become bigger problems.
Signs You Should Call Your Dentist
Healthy implants should not bleed, feel painful, or move. Schedule an evaluation promptly if you notice bleeding when brushing, swollen or receding gums, persistent bad breath, a bad taste, pus, pain when chewing, looseness, or a change in how your crown or bridge fits.
Do not wait to see whether these symptoms go away on their own. Early care can often protect the tissues around an implant and help prevent more extensive treatment later. If a crown feels loose or breaks, avoid chewing on that side until you are seen.
A few careful minutes each day can help your implant stay healthy, functional, and natural-looking. If you would like a personalized implant-cleaning routine or have concerns about your restoration, the team at United Dental Specialists can help you feel confident in every step of your care.
by Dr. David Bennett | Aug 4, 2026 | Uncategorized |
A missing tooth changes more than your smile. It can make chewing uncomfortable, affect the way you speak, and leave you thinking twice before a photo or a meal with friends. Understanding tooth implant cost is a practical first step toward replacing that tooth with a solution designed to look, feel, and function like a natural part of your smile.
Dental implants are a long-term restorative option, so the price reflects more than a single appointment. Your treatment is planned around your oral health, bone structure, smile goals, and the type of restoration you need. A personalized consultation is the best way to receive a clear estimate and understand your options without pressure.
What Is Included in Tooth Implant Cost?
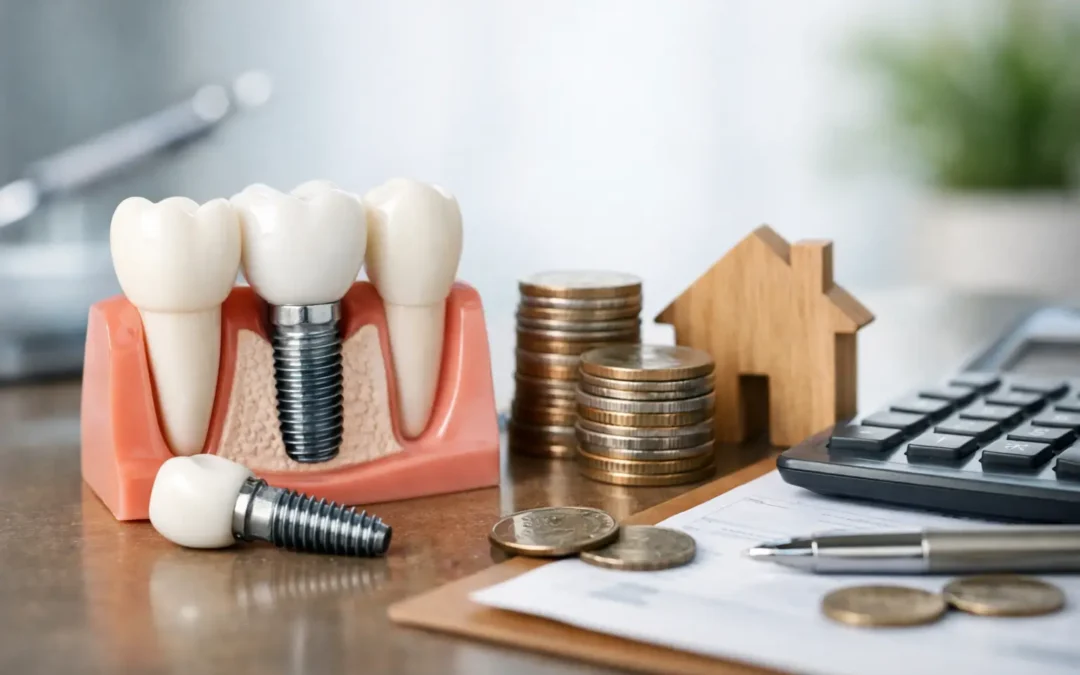
When patients compare implant prices, they may see a low starting number that does not represent the complete tooth replacement. A finished single-tooth implant typically has three primary components: the implant post placed in the jawbone, the abutment that connects the post to the restoration, and the custom crown visible above the gumline.
The implant post is usually made from biocompatible titanium and acts like a replacement tooth root. Once it integrates with your jawbone, it provides stable support for the final crown. The crown is crafted to blend with your surrounding teeth in shape, color, and bite alignment, which matters for both comfort and appearance.
A comprehensive estimate may also account for diagnostic imaging, surgical planning, anesthesia or sedation when appropriate, follow-up visits, and the final restoration. Because every step contributes to a predictable result, asking what is included is more useful than comparing a single advertised number.
Average Cost for One Dental Implant
For a single missing tooth, the total investment for an implant, abutment, and custom crown often falls in the range of $3,000 to $6,000. Costs can be lower or higher depending on the materials used, the complexity of treatment, and whether preparatory procedures are needed.
In the Miami area, experience, technology, and the quality of the final restoration can also affect pricing. A carefully planned implant is intended to restore daily function for many years, which is why patients should consider the full value of treatment rather than choosing solely by the lowest initial quote.
An implant is not automatically the right option for every situation. A bridge may be appropriate when neighboring teeth already need crowns, while a removable partial denture can offer a lower upfront cost. During your exam, your dental team can explain the benefits and trade-offs of each approach based on your goals.
Factors That Can Change Your Implant Treatment Cost
No two smiles have the same starting point. The largest differences in tooth implant cost usually come from the condition of the tooth site and the level of care needed to create a stable foundation.
Bone Grafting and Site Preparation
After a tooth is lost, the jawbone in that area can gradually shrink. If there is not enough healthy bone to support an implant securely, a bone graft may be recommended before or during implant placement. This additional treatment adds to the total cost and can extend the timeline, but it can also make a successful, lasting implant possible.
Some patients need a sinus lift for implants in the upper back jaw. Others may need gum treatment, removal of a damaged tooth, or treatment for an active infection before implant surgery. Addressing these issues first protects your health and gives the implant a better chance to heal properly.
The Type of Restoration You Need
Replacing one tooth is different from restoring a full arch. A single implant receives one crown, while several missing teeth may be replaced with an implant-supported bridge. For patients missing most or all teeth, full-arch solutions such as All-on-4 dental implants can restore an entire smile using a strategic number of implants.
Full-arch treatment has a higher overall cost than a single implant, but the per-tooth value can be very different. It may also eliminate the need for a removable denture and help restore stronger chewing ability, facial support, and confidence. The right solution depends on how many teeth are missing, the health of your bone and gums, and how you want your smile to function day to day.
Materials, Technology, and Clinical Expertise
Modern 3D imaging and digital treatment planning help your dentist assess bone volume, map implant placement, and plan around nearby structures. These tools support accuracy and reduce guesswork, particularly in more complex cases.
The materials selected for your crown also matter. High-quality porcelain and ceramic restorations can be designed for lifelike translucency and durability. Your dentist will recommend an option that fits the location of the tooth, your bite forces, and your cosmetic expectations.
Implant treatment is both surgical and restorative. The placement of the post, the way the gums heal around it, and the fit of the final crown all influence comfort and appearance. Choosing an experienced team that plans the complete process can help you avoid costly compromises later.
Does Dental Insurance Cover Implants?
Insurance coverage for dental implants varies widely. Some plans exclude the implant post but provide benefits for parts of the treatment, such as an extraction, bone graft, crown, or diagnostic imaging. Other plans may offer partial coverage after a waiting period or only when specific clinical requirements are met.
It is worth reviewing your benefits before treatment begins, but do not assume that a lack of full coverage means you have no options. Many practices can help you understand available benefits and discuss payment arrangements that make phased treatment more manageable. If immediate replacement is not necessary, treatment may sometimes be planned in stages around your budget and schedule.
Remember that insurance is a benefit, not a measure of what is best for your oral health. A treatment recommendation should be based on what will provide a stable, healthy result, with transparent financial information provided before you move forward.
Why a Personalized Implant Consultation Matters
Online ranges are helpful for setting expectations, but they cannot account for your specific needs. An in-person evaluation allows your dentist to examine your teeth and gums, assess your bite, review imaging, and identify whether additional treatment is needed.
At United Dental Specialists, implant planning is centered on the outcome you want: eating comfortably, smiling confidently, and protecting your long-term oral health. You should leave your consultation with a clear explanation of the recommended treatment, the expected timeline, and the costs associated with each phase.
Ask direct questions during your visit. Find out whether the estimate includes the final crown, what preparatory care may be needed, how long healing may take, and what follow-up care is included. Clear answers make it easier to compare options and make a decision you feel good about.
Caring for Your Investment After Treatment
A dental implant cannot develop a cavity, but the gum tissue and bone around it still need daily care. Brushing twice a day, cleaning between teeth, and attending regular dental visits help protect the tissues that support the implant. If you grind your teeth, a custom nightguard may be recommended to protect both your implant crown and natural teeth.
With consistent home care and professional maintenance, implants can be a durable solution for missing teeth. They are designed to support normal eating and speaking while helping prevent the shifting that can occur when a gap is left untreated.
You do not have to decide based on a number alone. A thoughtful implant consultation can turn questions about cost into a clear plan for restoring your comfort, function, and confidence.

Recent Comments